
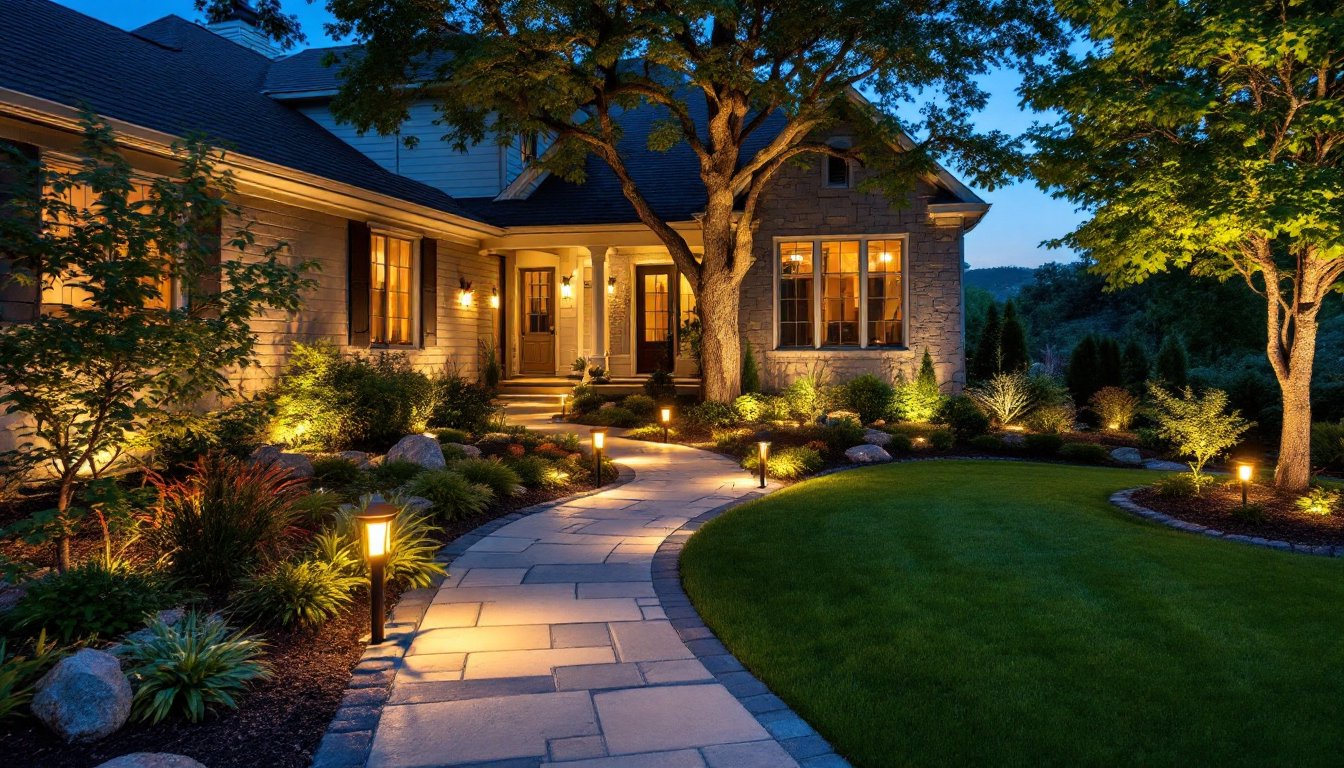
A well-designed landscape lighting system transforms an outdoor space from a dark void after sunset into an inviting, functional extension of the home. Whether the goal is to highlight architectural features, improve safety along pathways, or create ambiance for entertaining, landscape lighting systems offer practical solutions that boost curb appeal and property value. Unlike the guesswork of string lights and spotty floodlights, a thoughtful lighting plan uses layered, purposeful fixtures positioned to illuminate what matters. Homeowners can tackle much of a landscape lighting installation themselves, though understanding fixture types, design principles, and basic wiring requirements makes the difference between a professional-looking result and an amateur setup that wastes energy and looks haphazard.
Key Takeaways
- A landscape lighting system uses low-voltage LED fixtures with a transformer to safely illuminate outdoor spaces for functionality, aesthetics, and energy efficiency without requiring a licensed electrician.
- Effective landscape lighting design prioritizes layered lighting with a clear hierarchy—path lights for safety, spotlights for architectural features, and uplights for drama—rather than uniform bright coverage.
- LED fixtures consume 75–80% less energy than incandescent alternatives, last 25,000+ hours, and reduce long-term costs despite higher upfront prices compared to older bulb types.
- Proper installation requires locating underground utilities, burying cable at least 6 inches deep, choosing appropriately gauged wire, and testing the system before finalizing placement to avoid voltage drop.
- Most DIY landscape lighting systems cost $500 to $2,500, include multi-zone dimming for flexibility, and require minimal maintenance beyond seasonal lens cleaning and seasonal adjustments as landscapes mature.
What Is A Landscape Lighting System?
A landscape lighting system is a coordinated network of outdoor light fixtures, wiring, and a power source, usually a transformer, designed to illuminate grounds, structures, and plantings safely and aesthetically. Unlike indoor lighting, landscape systems work with low-voltage (typically 12-volt) current, which is safer for outdoor use and doesn’t require a licensed electrician in most jurisdictions (though always check local codes). The backbone is a transformer that steps down standard 120-volt household voltage to low-voltage power, then fixtures connect via buried or surface-run cable. A well-planned system uses different fixture types, path lights, spotlights, uplights, well lights, and wash lights, each with a specific job. The best systems balance three goals: functionality (safe navigation, security), aesthetics (highlighting landscape features), and efficiency (minimal energy draw, quality optics that focus light where it’s needed). Most DIY installations run $500 to $2,500 depending on yard size, fixture count, and whether burying cable is practical.
Types Of Landscape Lighting Fixtures
Path Lights, Spotlights, And Uplights
Path lights are short (typically 12 to 18 inches) fixtures that cast a downward cone of light onto walkways, driveways, and garden borders. They’re the workhorse of residential landscape lighting, easy to install, widely available, and effective for safety and wayfinding. Mount them 4 to 6 feet apart along pathways, but avoid spacing them so close that they create pools of harsh light: too far apart and you’ll have dark gaps that defeat the purpose.
Spotlights are adjustable fixtures (often 20 to 50 watts) that concentrate light on a specific focal point, a tree, sculpture, house facade, or architectural detail. They sit at ground level and angle upward or horizontally depending on the application. Spotlights require careful aiming: test placement before burying cable. A common mistake is using spotlights that are too bright: start with a moderate wattage and increase if needed rather than blinding visitors.
Uplights are essentially spotlights aimed upward from beneath a plant, tree, or structure to create drama and depth. Burying an uplight at the base of a mature tree and angling the beam upward through the canopy creates striking silhouettes and layers the lighting. These fixtures work best in darker environments where the contrast between lit and unlit areas feels intentional, not washed out.
Other useful fixture types include well lights (recessed into the ground, often in patios or decks) and wash lights (wide-beam fixtures that gently illuminate large wall surfaces or landscape swathes without harsh shadows). Each fixture has its place: resist the urge to light everything equally, as that flattens visual interest and wastes energy.
Lighting Design Principles For Outdoor Spaces
Start with a clear hierarchy: identify the main focal points (the house, a landscape feature, the entry), secondary areas (side yards, planted beds), and transition zones (pathways linking everything). Avoid overlighting: a common pitfall is treating the yard like a parking lot with uniform bright coverage. Instead, layer light, use lower-intensity path lights for safe navigation, medium-intensity spotlights for architectural or landscape highlights, and accent uplights for drama.
Color temperature matters. Warm white (2700K to 3000K) light feels inviting and is easier on nighttime vision than cool white (5000K+). Most residential landscape installations use warm white unless security or visibility is paramount. Consider shadow play intentionally: a strategically placed spotlight casting a tree’s shadow on a house wall adds depth, while haphazard shadows from poorly aimed lights look amateurish.
Dimming and timers extend both function and efficiency. A system with a multi-zone dimmer or smart controller lets homeowners adjust light levels throughout the evening and turn lights off at preset times. Group fixtures by circuit, entry lights on one, pathway lights on another, accent lights on a third, so controls match use patterns. This also helps troubleshoot failures: if one zone goes dark, a single transformer or circuit is likely the culprit, not a dozen individual fixtures.
Before installation, sketch the yard to scale, mark fixture locations, and walk the path at dusk with the sun gone to simulate where light should be. This saves digging mistakes and prevents underlit or overlit zones.
Installation And Maintenance Considerations
Most low-voltage landscape lighting systems are DIY-friendly, but success hinges on prep work. Locate underground utilities (call 811 or your local utility locating service before breaking ground) and plan cable routes to avoid lawn furniture, future construction, and high-traffic areas. Bury cable at least 6 inches deep unless using armored cable rated for shallow burial.
Choose a transformer location near a GFCI-protected outdoor outlet. Mount it in a weatherproof box or cabinet, not directly on the house, to keep it accessible for seasonal adjustments. Run cable in a single main line from the transformer, then branch to fixtures. Use low-voltage wire rated for direct burial (usually marked UV-resistant) and don’t skimp on gauge: undersized wire causes voltage drop, dimmer lights, and premature fixture burnout. For runs longer than 100 feet, consult the transformer wattage specs to ensure the circuit can handle the load.
Fixture installation is straightforward: stake-mount path lights into the ground, embed well lights during patio construction or carefully in existing hardscape, and position spotlights and uplights on driven stakes or brackets. Ensure each fixture sits level (tilted fixtures cast sloppy light) and test the system before backfilling or finalizing placement.
Maintenance is minimal. Clean fixture lenses once or twice a season (dust and pollen reduce output), check cable connections for corrosion, and replace burned-out LED bulbs or fixtures as needed. LED fixtures now dominate the market and last 25,000+ hours, making incandescent and halogen fixtures obsolete for new installations. Seasonal adjustments, lowering path light stakes when grass grows or repositioning spotlights as trees mature, keep the system looking sharp.
Energy-Efficient And Smart Solutions
LED fixtures are the standard now, consuming 75–80% less energy than incandescent equivalents while delivering superior color rendering and lifespan. A 4-watt LED path light outperforms a 20-watt incandescent, and the energy savings compound over a season or year. Calculate total wattage (sum all fixture wattages) before buying a transformer: most residential systems draw 300 to 600 watts, well within standard transformer ranges.
Smart landscape lighting systems integrate with home automation platforms (Apple Home, Google Home, Alexa) and allow scheduling, dimming, and zone control via smartphone. These systems cost more upfront but appeal to tech-savvy homeowners and simplify seasonal adjustments. Timer-only transformers are cheaper and reliable alternatives if smart features aren’t a priority.
Solar path lights are tempting for simplicity (no wiring) but have limits. They’re great for supplementary accent lighting in areas away from the main system, but their batteries fade after a few seasons and output is modest compared to wired fixtures. Reliable brands exist, but cheap solar lights often disappoint. Reserve solar for low-stakes applications, edges of a flower bed, occasional accent markers, not primary pathway or security lighting.
Consider the total lifecycle cost. A $40 LED path light that lasts five years is cheaper per year than a $10 incandescent that burns out annually or a $60 solar light whose battery degrades after two seasons. Compare fixtures on rated lifespan, warranty, and light output (lumens), not just upfront price.
Conclusion
A landscape lighting system doesn’t need to be complex or expensive to transform an outdoor space. Start by identifying focal points, choosing fixture types that match each zone’s function, and planning cable routes carefully. Low-voltage LED systems are accessible for DIY installation, energy-efficient, and reliable, and the payoff in safety, curb appeal, and evening usability justifies the investment. Begin with a modest approach: core fixtures for pathways and entry, a few accent lights for drama. Expand later if needed. The key is thoughtful design, proper installation, and honest maintenance, then step back and enjoy a yard that works as hard at night as it does during the day.